blank
blank

Compassion

Wednesday, December 8, 2010

Now I Know My ABC’s ~ z is for zzzzzzzz!

It's time for some fun alphabet crafts!! We hope you enjoy these! If you are new, you can visit our ABC webpage to find links to any other letters we have done, letters (with books listed) coming up, as well as all the fun crafty letters we have been working on. Be sure to check it out!
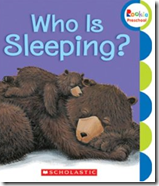
image Who is Sleeping? by Karen Sapp

Summary: Do you know what animals sleep when it’s cold during the winter? Find out in this sweet book!!

z is for sleeping craft

What You’ll Need:

  • craft foam in your color choice
  • scissors
  • glue/glue dots
  • pencil {to trace}
  • sequin or pom pom

IMG_0176

How to Make the ‘z’ for Zzzzzzz….

  1. Cut out a lowercase ‘z’ from a foam sheet. To make the letters go along with the uppercase letters we’ve done in the past, this letter was cut from a piece of foam that was about 3” x 4”.
  2. Cut out a ‘night hat’ from a different color of foam.
  3. Glue the hat onto the letter z and add a pom pom to the end or a sequin.


Monday, December 6, 2010

Little Books for Little Cooks ~ J is for Jesus

Little Books for Little Cooks

Candy Cane Cookies

candy cane cookie

These cookies were such a big hit in our house, I only had the chance to take a picture of ONE!

The Book Before You Cook…

 J is for Jesus

J is for Jesus: the Sweetest Story Ever Told

by Crystal Bowman

Summary: You and your little one will have fun learning how the candy cane is a symbol of Jesus’ birth.

When It’s Time to Cook…

You’ll Need:

  • roll of sugar cookie dough {or you can make your own batch}
  • red food coloring
  • spatula for mixing
  • baking sheet
To Make:
  1. Divide a roll of sugar cookie dough in half.
  2. Use red food coloring to color one half of the dough.
  3. Make 1” balls from each half of the dough.
  4. Take one red dough ball and one white dough ball and roll each one out like a snake.
  5. Lay the white and red snake next to each other and gently twist them together.
  6. Place on cookie sheet and shape like a candy cane.
  7. Bake at 350 for 6-7 minutes.

Hope you enjoy this cooking activity with your little one! To see more featured books and activities, click here!

Little Books for Little Cooks is a bi-monthly feature that focuses on creating some edible fun with your little one.   We will share a fun book to read with your little one along with a cooking activity to do that ties in with the featured book. Sometimes there may be actual cooking involved…and sometimes just fun!


Saturday, December 4, 2010

Treats 4 Tots

Photobucket

Here are some more cool giveaways for tots/moms of tots, check them out below and let us know if you win something we told you about!!!!

Bolded are items we personally own and love!  If you are hosting a TOT friendly giveaway you are free to leave a link in the comments section!

If you are looking for gift recommendations for tots, I have a list on my blog here…

Gift-Ideas..4222

Friday, December 3, 2010

50% off Melissa & Doug Toys!!

We love Melissa & Doug toys and today Amazon’s Deal of the Day is a variety Melissa and Doug products!!! They have 50% off a big selection of their toys, so I wanted to pass along some of the deals.

Some great ideas for little ones would be the soft picnic basket food set:

imagea Sandwich Making Set…

image

or even the cutting food box!

image

They have a variety of other deals on tot and preschool toys too, so be sure to check out the full page of on sale items here!!

Last week, I signed up for a FREE trial of Amazon Prime and I am in love! Get 2 day shipping for FREE – perfect for all of your holiday shopping. Get more info on Amazon Prime here.

Just wanted to share the deals with you!!


Thursday, December 2, 2010

Once Upon a Book ~ Mortimer's Christmas Manger

Photobucket
image

by Karma Wilson

Summary: Unhappy in his cold, dark hole under the stairs, Mortimer the mouse finds a home that is just his size…the nativity scene. Mortimer believes he has found the perfect home until he overhears the telling of the birth of Christ and discovers who truly belongs in there! 

Bible Verse

For there is born to  you today in the city of David, a Savior who is Christ the Lord. Luke 2:11

Language

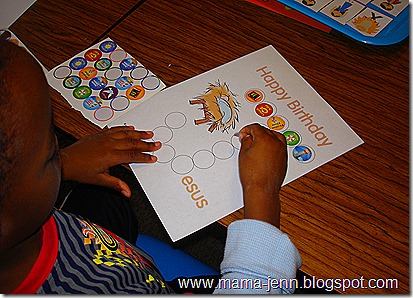
We learned the letter J and used the Happy Birthday Jesus dot printable from 1+1+1=1 as a reinforcement. Rather than using our Do-A-Dot markers, we used round stickers to make the letter J! This was a FAVORITE for the little boys!

083

Math

We used the Jesus counting cards from Confessions of a Homeschooler's Letter of the Week Curriculum to work on our numbers. The boys clipped the appropriate number of clothes pins onto each card. For more of a challenge for little fingers, consider using mini clothes pins.

065

We also used the nativity sequencing and sorting cards from The Nativity Preschool Pack on 1+1+1=1.

072
078

Motor Skills
 
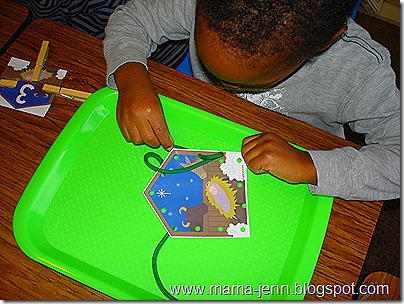
We used the Jesus lacing cards from Confessions of a Homeschooler.

073

Pre-writing Skills

The boys used the nativity tracing page from the 1+1+1=1 Nativity Pack and LOVED it!

088

Snack

Build a pseudo gingerbread house using the Mini Holiday House recipe!

Song

We pulled out our Songs of Saplings CD and sang the Luke 2:11 Christmas song.

Dramatic Play

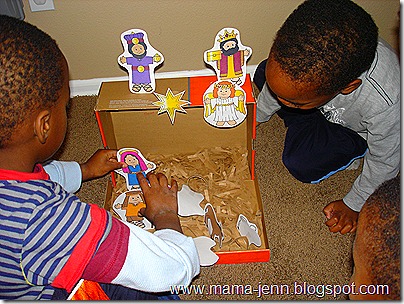
Read the nativity story from Luke 2:1-20 and act it out! This is a Christmas morning tradition in our family that the kids have grown to love!!! In keeping with our tradition, we will wait until Christmas morning to act out the birth of Christ. However, we did reenact the story with our nativity sets.

094

While we mostly used our homemade nativity sets (grins…I won’t let the kids play with my nativity set), there are some really cute kid-friendly nativity sets available!


Want to see what's coming next (and books we've done in the past)? Click here to see our Once Upon a Book webpage!

Wednesday, December 1, 2010

Now I Know My ABC’s ~ y is for yardstick

It's time for some fun alphabet crafts!! We hope you enjoy these! If you are new, you can visit our ABC webpage to find links to any other letters we have done, letters (with books listed) coming up, as well as all the fun crafty letters we have been working on. Be sure to check it out!

image

 Length by Henry Arthur Pluckrose

Summary: Pictures of real life objects that will show your little one how to measure and what length is.

IMG_9361 

What You’ll Need:

  • yellow foam sheet
  • brown foam sheet
  • scissors
  • pencil
  • black pen/marker IMG_9362

How to Make the ‘y’ for yardstick

  1. Cut out a lowercase ‘y’ from a yellow foam sheet. To make the letters go along with the uppercase letters we’ve done in the past, this letter was cut from a piece of foam that was about 6” x 4”.
  2. Cut a long rectangular piece from brown foam to use as your yardstick. Our piece was almost as long as the long side of the letter ‘y’ and slightly more narrow {about 1” x 6”.
  3. Mark the yardstick with the inches. We marked 12, 24, and 36 inches and then made tick marks for the quarter and half feet.
  4. Glue the yardstick on lowercase y.
  5. Pull out a yardstick and have fun measuring things around your house!