blank
blank

Compassion

Thursday, July 26, 2012

Language Activity for Bugs! Bugs! Bugs! ~ Once Upon a Book

Photobucket
 
Book Summary: Pretty ladybugs, fluttering butterflies, creepy daddy longlegs, and roly-poly bugs are some of the familiar creatures featured in this whimsically illustrated insect album. Complete with an "actual size" chart and bug-o-meter listing fun facts about each bug, Bugs! Bugs! Bugs! will inform and entertain curious little bug lovers everywhere.


Bb is for Bugs!

Help your tot recognize the letter Bb by helping them decorate them with fingerprint bugs!

Materials:
Directions:
Print off the Bb is for Bugs Fingerprint Art Page from Happy Brown House and gather your supplies.

Using the stamp pad, have your tot use their finger to make dots on the paper. This can be messy, but tots love messy! Have a baby wipe nearby for easy clean-up.

Let them use the black marker or pen to draw legs, antennae, wings, etc. on the fingerprints to make them look like bugs. You might need to demonstrate how to do this on the first bug. Let their creativity flow!


Listen for the Bb Sound
Play a listening game to help them identify the beginning Bb sound. Say bug names/features (some of them should start with Bb and some of them should not~mix it up). When your child hears the Bb sound, let them clap, jump, etc. (anything really!)

Here are a few Bb words to help you: bug, bumblebee, buzz, beetle, butterfly

Other words to mix in: caterpillar, wing, antennae, grasshopper, dragonfly, spider, web

Did you miss a post? Don't forget to check out all the other insect posts!
Sara

Monday, July 23, 2012

Montessori on the Go ~ Making the Most of What You Have

Montessori at Home

I am traveling in a van that is full. Full of bikes, bags, food, and six people. I didn't have room to bring toys for a certain precious, {currently sleeping} girl.


The first week of our vacation doesn't necessitate entertainment. That is the beauty of family camp.

However, after the flurry of activity and the galloping of horses we journey into the remote wilderness of Canada.

What will my little girl do without toys?

Montessori activities are easy (and cheap) to create. Because the learning activities focus on isolating specific skills, a muffin tin, a spoon, and dry macaroni noodles can become more engaging than a Leap Frog microphone.

You really don't have to scour the Internet for Montessori activities. With a simple box of various materials you can create countless varied activities by swapping containers, kitchen utensils, and food item.

Suggested items to have on hand for quick and easy Montessori moments are (but not limited to):
Measuring cups
Cookie sheet
Muffin Tim
Paper cups
Clothespins
Eye droppers
Buttons
Mirror
Uncooked popcorn
Rice
Beans
Empty egg cartons
Spices
Funnels
Beads
Tongs
Spice bringer
Whisk
Soup ladle

The wilderness we are traveling to contains a little rustic red cabin, complete with the kitchen utensils I used as a little girl.

As we play while the boys chase bears, Naomi and I will practice "the three step lesson" to enhance her memory.

By mimicking a very simple technique you can help you child expand her memory and name recognition. You will need three objects for the following activity.


Identify: This is. . . . Initially show each object independently.

Recognize: Show me the . . .At this point you will set out the (3) objects you were working with. Rotate the placement of the object and ask you Tot to point to the object you name. Repeat 3-5 times.

Recall: What is this? Hide the objects and only one out at a time. This time ask your student to name the object.

Keep the time spent doing the three step lesson light and engaging. Do not force your child and rod the moment of enthusiastic learning. Be sure to review past lessons!

I love Montessori moments. Because I know that simple objects can become teaching tools and encourage learning, I don't panic when the car is too full to bring toys.  

To review what we have covered so far in our Montessori at Home journey, click here. Would you like some more Montessori at Home ideas? Each month Jodi shares Montessori ideas based on the ebook, Montessori at Home by John Bowman. Find more ideas in the Montessori Minute posts over at 1+1+1=1.

 signature button Jodi

Friday, July 20, 2012

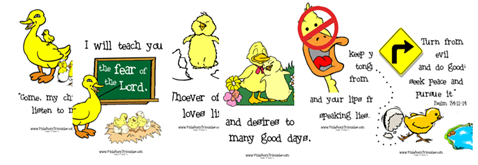
In My Heart ~ Psalm 34:11-14

       
Listen to Me {Psalm 34:11-14} is #11 from Seeds of Purpose.       image 

Full Page Verse Printable…

Verse Mini Book {which could also be cut into mini flash cards to have kids put the verse in order}…   
Copy Work Tracers {print & cursive}


Copy Work Sheets…

Full Verse Coloring Pages… 


Visit the main Seeds Family Worship Printables page here.

Visit Seeds Family Worship to learn more about their ministry here!

image30222222222222222222222222222

Thursday, July 19, 2012

Stained Glass Butterfly Art ~ Bugs! Bugs! Bugs! ~ Once Upon a Book

Photobucket
 
Book Summary: Pretty ladybugs, fluttering butterflies, creepy daddy longlegs, and roly-poly bugs are some of the familiar creatures featured in this whimsically illustrated insect album. Complete with an "actual size" chart and bug-o-meter listing fun facts about each bug, Bugs! Bugs! Bugs! will inform and entertain curious little bug lovers everywhere.

Stained Glass Butterfly Art


Materials:
  • Clear Contact Paper
  • Construction Paper
  • Scissors
  • Marker
  • Tissue Paper
Directions:
Fold the paper into fourths (in half, then in half again).
Draw a curve (similar to making paper hearts). Make sure to keep the folded corner inside the shape like the picture below. If you don't, this strategic cut won't work.
Cut along the line.
About an inch or so in, make another line on the inside of the shape. Make sure you don't cut the corner off.
Cut along the line.
Open.
Measure a piece of the contact paper larger than the butterfly shape. Carefully peel the paper off the clear contact paper. Lay the contact paper sticky side up on the table. To keep it from moving all over the place and getting crumpled by little hands, turn an inch under on the sides and stick it to the table. Carefully place the butterfly outline on the sticky contact paper.
Cut pieces of tissue paper or let your tot practice cutting. We chose to practice cutting. I cut strips of tissue paper and let my son cut the strips.
Have your tot place the small pieces of tissue paper on the sticky contact paper. No glue needed!
Encouraged them to keep going until they have filled the entire space. It's alright if the tissue overlaps.
Fold a piece of paper (about 4 inches wide) in half. Draw half of a butterfly body.
Cut along the line and open.
Place the butterfly body in the center of the wings. Allow your tot to draw a face and antennas.
Cut another piece of contact paper large enough to cover the entire butterfly. Carefully peel the paper backing and place on top. Cut around the edges. Display on a window that gets some sunlight.
Concepts to Discuss:
  • I know it would be tempting to prep this activity ahead of time, but know that cutting the wings is a perfect time to discuss symmetry and let them be amazed. Don't miss this opportunity!
  • While my son was placing the tissue paper on the wings, I reminded him of a fact we learned about butterflies in the beautifully illustrated book, A Butterfly Is Patient. Butterfly wings are made up of little scales (similar to the shingles on a roof). The tissue paper we placed on the wings illustrated this butterfly fact perfectly.
Be sure to check out the other activities to go with Bugs! Bugs! Bugs!

Sara